Showing posts with label BLOGGING GEEK. Show all posts

Wednesday, 16 January 2013

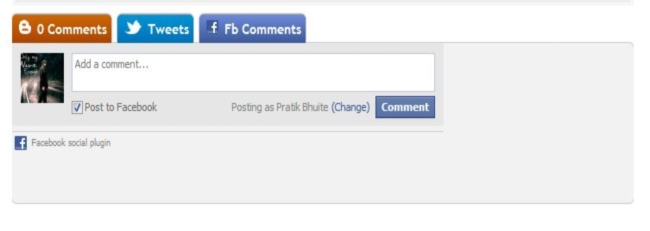
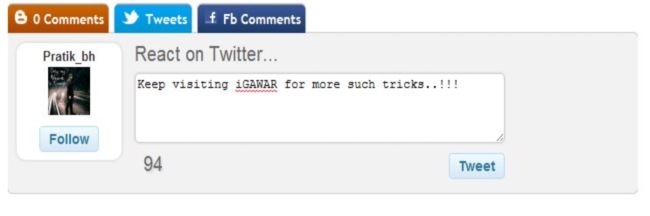
Integrate Facebook/Twitter Tab in Blogger Comment Box

Add Facebook/Twitter Tab in Blogger Comment Box

Add Facebook/Twitter Tab in Blogger Comment Box

Liked The facebook and Twitter tab Integration in intensedebate??
want facebook comment system along with default blogger comment box??
So here is the trick how to do that..!!!

iGAWAR Presents Integrate Facebook/Twitter Tab in Blogger Comment Box, A tutorial that will Explain How to add facebook and twitter comment box along with your blogger default box to increase your visitors..!!!
So here is the trick to do so..!!

  • Go to Blogger Dashboard --> Template --> Edit HTML
  • Backup your Template before making any changes to your blog.Click here to know how to backup blog. 
  • Now Check Expand Widget Template.
  • Press Ctrl + F and search the code shown below.

<head> 

ADD Below Code Just Below <head>


<meta content='pratik.bhuite' property='fb:admins'/>
<meta content='YOUR_FACEBOOK_API' property='fb:app_id'/>
<script src='http://code.jquery.com/jquery-latest.pack.js'/>
<script src='http://jsblogstop.googlecode.com/svn/commentpages/jsCommentPages.js'/>
<script src='http://connect.facebook.net/en_US/all.js#xfbml=1'/>
<script src='http://jsblogstop.googlecode.com/svn/jstweetbox/v1/jsTweetBox.js'/>
<script src='http://platform.twitter.com/anywhere.js?id=TWITTER API KEY&amp;v=1'/>


Now Search for Below code

<div class='comments' id='comments'>

Now add The Below code just after above Code...!!!

<b:if cond='data:blog.pageType != &quot;static_page&quot;'>
<div class='js-default-tab comments-tab' id='blogger-comments' title='Comments from Blogger'>
<data:post.numComments/> Comments
</div>
<div class='comments-tab' id='twitter-comments' title='Comments with Twitter'>
<span class='js-page-tweet-count' expr:href='data:post.url'/> Tweets
</div>
<div class='comments-tab' id='fb-comments' title='Comments made on Facebook'>
<fb:comments-count expr:href='data:post.url'/> Fb Comments
</div>
</b:if>
<div class='clear'/>
</div>
<div class='comments-page' id='twitter-comments-page'>
<div data-bitly-key='R_b5f7d5706378f044755c16d1296708bb' data-bitly-login='pratikbhuite' data-publisher='pratikbhuite' id='js-tweet-box'/>
</div>
<div class='comments-page' id='fb-comments-page'>
<b:if cond='data:blog.pageType == &quot;item&quot;'>
<div id='fb-root'/>
<fb:comments expr:href='data:post.url' num_posts='10' width='500'/>
</b:if>
</div>
<div class='comments comments-page' id='blogger-comments-page'>


Now change the following things form the code

pratik.bhuite   ::  your facebook ID
YOUR_FACEBOOK_API :: your facebook API (Application ID CODE) code.
TWITTER API KEY ::  your Twitter App id key.
R_7fb135d4103581f8d39f59a86612ff27  :: yoyr btyly.com key and username.
if you dont hav bytly.com account keep my key/username only..!!


If you have any problem with this Trick then feel free to ask in comment box below..!!
Keep visiting @iGAWAR

Sunday, 30 December 2012

How to make Blog Archive Scrolling/look better?

How to reduce Size of Blog Archive By make it Scrolling?


How to make Blog Archive Scrolling?-iGAWAR 

Want To Make Your Long Archive List Short Without Removing Any Content??
Want To make Your Archive Look Attractive?
Want To Make Your Archive SEO Friendly..!!
iGAWAR Presents How to make Blog Archive Scrolling, A tutorial Which Helps you In Optimizing Your archive list by making It scroll And thus Reducing Its Size..!
Itz very Important to have Archive List On Your blog As itz the Easiest Ways For Your Visitor To Browse Your blog..!
But Having A Long Archive list Makes your blog Look Dull and un Attractive.So here We Come Up with this trick!!:)
You Can See The Live Demo, Here AT  iGAWAR .So lets Start With Code
  • Go to Blogger Dashboard --> Template --> Edit HTML
  • Backup your Template before making any changes to your blog.Click here to know how to backup blog.
  • Now Check Expand Widget Template.
  • Press Ctrl + F and search the code shown below.
<div id='ArchiveList'>
This Code Will BE like


<div id='ArchiveList'>
  <div expr:id='data:widget.instanceId + &quot;_ArchiveList&quot;'>
    <b:if cond='data:style == &quot;HIERARCHY&quot;'>
     <b:include data='data' name='interval'/>
    </b:if>
    <b:if cond='data:style == &quot;FLAT&quot;'>
      <b:include data='data' name='flat'/>
    </b:if>
    <b:if cond='data:style == &quot;MENU&quot;'>
      <b:include data='data' name='menu'/>
    </b:if>
  </div>
  </div>


Replace this Entire Code By


<div style='overflow:auto; width:ancho;height:300px;'>
<div id='ArchiveList'>
<div expr:id='data:widget.instanceId + "_ArchiveList"'>
<b:if cond='data:style == "HIERARCHY"'>
<b:include data='data' name='interval'/>
</b:if>
<b:if cond='data:style == "FLAT"'>
<b:include data='data' name='flat'/>
</b:if>
<b:if cond='data:style == "MENU"'>
<b:include data='data' name='menu'/>
</b:if>
</div>
</div>
</div>

To Change Height Of Archive Scroll Box Change height:300px;


  • Preview Your Template And Save it..!!


If you facing any problem with this Trick then feel free to ask in comment box below..!!
Happy Blogging..!!
Keep visiting @iGAWAR

Saturday, 29 December 2012

How To Add Two Sidebar Above/Below To Any Default Sidebar

How to Divide Blog template's Sidebar Into two Parts?


How To Add Two Sidebar Above/Below Any Default Sidebar-iGAWAR


Want to Add two sidebar Just below And above any default sidebar??
Want to Divide A single sidebar into two of any width??
iGAWAR Presents How To Add Two Sidebar Above/Below Any Default Sidebar , A tutorial that will Help You to Customize Your Blog template's Sidebar.Thanks to simplebloggertutorials for Creating this trick..I just Customized it further And explained it in simple ways..!!


So lets Start Customizing Your Sidebar:

The main Sidebar Is assigned As #sidebar-wrapper  in most of the templates.
If you have 3 Column templates then the the Other sidebar will be named as  #sidebar-wrapper1 and  #sidebar-wrapper2.


To Add two Sidebar In Main Sidebar , Follow Below Steps:
  • Go to Blogger Dashboard --> Template --> Edit HTML
  • Backup your Template before making any changes to your blog..Click here to know how to backup blog.
  • Press Ctrl + F and search the code shown below.
#sidebar-wrapper {
width:220px;
float:right;
word-wrap:break-word;
overflow:hidden;
}

Add the Following Code Just Behind The Above Code Code:

#right-col {
width:48%;
float:right;
word-wrap:break-word;
overflow:hidden;
}
#left-col {
width:48%;
float:left;
word-wrap:break-word;
overflow:hidden;
}

Now Find

<div id='sidebar-wrapper'>
<b:section class='sidebar' id='sidebar' preferred='yes'/>
</div>

Replace this Entire Code  By Below Code:

To Add Two sidebar below main widget use this code:


<div id='sidebar-wrapper'>
<b:section class='sidebar' id='sidebar' preferred='yes'/>
<b:section class='sidebar' id='left-col' preferred='yes'/>
<b:section class='sidebar' id='right-col' preferred='yes'/>
</div>

To Add Two sidebar Above main widget use this code:

<div id='sidebar-wrapper'>
<b:section class='sidebar' id='left-col' preferred='yes'/>
<b:section class='sidebar' id='right-col' preferred='yes'/>
<b:section class='sidebar' id='sidebar' preferred='yes'/>
</div>

To change the Width of new left/right Side bar
Change
width:48%;
you can change 48% to any number.
just make sure that the sum of both the width is less that 98%.


Preview the template and save it..!
Check layout section to observe the Change..!!

                                                       igawar customizing sidebar into two parts


If you facing any problem with this Trick then feel free to ask in comment box below..!!
Happy Blogging..!!
Keep visiting @iGAWAR

Friday, 14 December 2012

Fully Customizable JavaScript Image Slider For Blogger

Alternate for jQuery Image Slider For Blogger

Html Image Slider
Alternate for jQuery Image Slider For Blogger

Want Fastest Image slider??
A slider whom you can customize as per your taste??

iGAWAR Presents Javascript image slider for blogger who want their blog to load up fast..!!
Every1 wants an cool slider for their blog which gives great look to the template and engage the visitors which ultimately means MORE TRAFFIC..!!
Nowadays NOVA sliders become famous but many blogger refuse to use it because it Uses jQuery technology which very much increase increases the loading time of the blog and reduses site performance..!!
So what to do?? The Solution is here..!!
After so much searching i find this awesome slider created by helperblogger.A Html Coded Slider which only uses javascript and loads up very fastly.
you can see the live Demo of it over here
  1. Go to Blogger Dashboard > Layout
  2. Click on Add a Gadget
  3. Scroll down and select HTML/JavaScript .
  4. Keep title box blank and Paste code inside code box.
<style type="text/css"> /* JavaScript Image Slider By http://www.helperblogger.com/ */ #mcis { display: none; } #sliderFrame { position: relative; width: 500px; margin: 0 auto; border:5px solid #000; } #ribbon { width: 111px; height: 111px; position: absolute; top: -4px; left: -4px; background: url(https://blogger.googleusercontent.com/img/b/R29vZ2xl/AVvXsEi4kBGz5cJ-B2UyFGAJ6Z4cPo0zyUrrDNHiW7Zjty8U36rzR4DsY88wNBmzfAIfU-1_9Zn72fVGQCLKxjIqI5Km8QUKE-B4ROcFEgUqvCkdo5FhwVk7sEhp-sku0MW4noJfdXvfu7pI6ok/s1600/helperblogger.com-ribbon.png) no-repeat; z-index: 7; } #slider { width: 500px; height: 218px; background: #fff url(https://blogger.googleusercontent.com/img/b/R29vZ2xl/AVvXsEhV_GU8tTGw0R-NsSu9qm39xTJ3LM9pDzQqd-w1LzGzMGEBj8648IOOJ5sFFiFwjEJgNPLxRj1hawp3Wl-gvjsqI88jEjbBtISx5zw9IFot958ersomYrXaN__frlTjffmVJ_3i6JUW7aw/s1600/helperblogger.com-loading.gif) no-repeat 50% 50%; position: relative; margin: 0 auto; box-shadow: 0px 1px 5px #999999; } #slider img { position: absolute; border: none; display: none; } #slider a.imgLink { z-index: 2; display: none; position: absolute; top: 0px; left: 0px; border: 0; padding: 0; margin: 0; width: 100%; height: 100%; } div.mc-caption-bg, div.mc-caption-bg2 { position: absolute; width: 100%; height: auto; padding: 0; left: 0px; bottom: 0px; z-index: 3; overflow: hidden; font-size: 0; } div.mc-caption-bg { background-color: black; } div.mc-caption { font: bold 14px/20px Arial; color: #EEE; z-index: 4; padding: 10px 0; text-align: center; } div.mc-caption a { color: #FB0; } div.mc-caption a:hover { color: #DA0; } div.navBulletsWrapper { top: 250px; left: 190px; width: 150px; background: none; padding-left: 20px; position: relative; z-index: 5; cursor: pointer; } div.navBulletsWrapper div { width: 11px; height: 11px; background: transparent url(https://blogger.googleusercontent.com/img/b/R29vZ2xl/AVvXsEih2wYK5Gg3RZHoZl_gApmq3zKZ2vKvVC0WyD3jxOs6Th0TKUJv1kQYsu1JemRoEkxIlW-5EVavmSYzUm4f46uPNHgFeLIVz6XLNQQtkTq0T0ix4H_2u14o77C-5uwTTMg9l1ehYmTiCpE/s1600/helperblogger.com-bullet.png) no-repeat 0 0; float: left; overflow: hidden; vertical-align: middle; cursor: pointer; margin-right: 11px; _position: relative; } div.navBulletsWrapper div.active { background-position: 0 -11px; } #slider { transform: translate3d(0,0,0); -ms-transform: translate3d(0,0,0); -moz-transform: translate3d(0,0,0); -o-transform: translate3d(0,0,0); -webkit-transform: translate3d(0,0,0); } </style> <script src="http://code.helperblogger.com/js-image-slider.js" type="text/javascript"></script> <div id="sliderFrame"> <div id="ribbon"></div> <div id="slider"> <a href="#"><img src="http://images.helperblogger.com/jsSlider/helperblogger.com-1.jpg" alt="Image Slider By helperblogger.com"/></a> <a href="#"><img src="http://images.helperblogger.com/jsSlider/helperblogger.com-2.jpg" alt=""/></a> <a href="#"><img src="http://images.helperblogger.com/jsSlider/helperblogger.com-3.jpg" alt="The slide is a linking image"/></a> <a href="#"><img src="http://images.helperblogger.com/jsSlider/helperblogger.com-4.jpg" alt="Pure Javascript. No jQuery. No flash."/></a> <a href="#"><img src="http://images.helperblogger.com/jsSlider/helperblogger.com-5.jpg" alt="#htmlcaption"/></a> </div></div>


Important Note - Before adding  images to slider resize all of them to same size.

Color Codes Info - 

      - Width Of Slider

Set the width of slider according to your image width also use the images of same width and same heights.

      - Width Of Slider

Set the height of slider according to images height also use images of same width and height.

      - Image URL

Replace all highlighted image URL's with your own images URL.

      - Image Caption

Here you can add your image caption.

      - Link To Image

If you want to add any link to image then replace # with your own image URL.


If you have any problem with this Trick then feel free to ask in comment box below..!!
Keep visiting @iGAWAR


Thursday, 25 October 2012

No Hands SEO v1.7.11.0(cracked) Full Version Download

No Hands SEO v1.7.11.0 + Crack Free Download


                              No Hands SEO v1.7.11.0 + Crack


Today webmasters like yourself spend far too much time getting backlinks just to see a tiny trickle of traffic after weeks of endless work.

No Hands SEO offers a totally automated way of gaining unlimited backlinks from many different sources and platforms.


Today webmasters like yourself spend far too much time getting backlinks just to see a tiny trickle of traffic after weeks of endless work.

No Hands SEO offers a totally automated way of gaining unlimited backlinks from many different sources and platforms.


Instruction to Crack:

1. Replace the file given in folder "Crack" to Installation directory.

2. Run the program and enter

Email : Admin@Gome.vn
Passowrd : gome.vn

If you get "Login details could not be found", click OK and enter any details.


Password=iGAWAR

Report in comments Box below if any Download links are broken and deleted ...!!!!
Keep visiting @iGAWAR


Wednesday, 24 October 2012

How to Add A Picture To Anonymous Comment Of your Blog Post

How To Change Blogger Default Anonymous Comment Avatar/picture

How to Add A Picture To Anonymous Comment Of your Blog Post-iGAWAR
Want to change Your anonymous Comment Avatar??
Want to stylify Your blog Comment using Cool Avatar??

iGAWAR Presents How to Add A Picture To Anonymous Comment Of your Blog Post, A tutorial That will help you to change your default Anonymous Comment Avatar/Image in Easy Steps..!
Change Avatar of Anonymous As well As Default Pic And Make You Blog Attractive..!!

So lets Start With How To do This:


  • Go to Blogger Dashboard --> Template --> Edit HTML
  • Backup your Template before making any changes to your blog.Click here to know how to backup blog.
  • Press Ctrl + F and search the code shown below.


</body>

Add Following  Code Just Above The above Code:

<script src='http://code.jquery.com/jquery-latest.js'/>
<script>
$(&quot;img[src=&#39;http://img1.blogblog.com/img/anon36.png&#39;]&quot;)
.attr(&#39;src&#39;, &#39;https://blogger.googleusercontent.com/img/b/R29vZ2xl/AVvXsEhDoVrwwOyDVJNQ0ie9GW927nQv9dIN3PIbz76Lk3edFHWQd1akz1py_rcak_cxwEjfmys4HTzmnKRNgLw5g437dd5NZpVFut_Raie64zubnKP2VtWO_uQgm2OW0SQK-sMppQ3HRT2LW4w/s1600/default_avatar.gif&#39;)
.ssyby(&#39;blank&#39;)
</script>
<script src='http://code.jquery.com/jquery-latest.js'/>
<script>
$(&quot;img[src=&#39;http://img2.blogblog.com/img/b36-rounded.png&#39;]&quot;)
.attr(&#39;src&#39;, &#39;https://blogger.googleusercontent.com/img/b/R29vZ2xl/AVvXsEg8AY3LS57hSptAMOLx1Fv-mc5rvoMziJsfsLdckAXzirRJcgYf2wkY-mJvedPQoLFcNdEvh64okb2JPnLlcW_lIEsVEOrZKkwa05A4yW1CE9Bw-XLaqrVH1ESvJN8U9VJGpguARV1F4O8/s1600/blogger-user.png&#39;)
.ssyby(&#39;blank&#39;)
 </script>


Change the Pic Url In RED With Your Choice To change Anonymous Avatar.
Change Pic Url In Green With Your Choice To change Default Avatar.

Some Good Picture url Are:


https://blogger.googleusercontent.com/img/b/R29vZ2xl/AVvXsEhDoVrwwOyDVJNQ0ie9GW927nQv9dIN3PIbz76Lk3edFHWQd1akz1py_rcak_cxwEjfmys4HTzmnKRNgLw5g437dd5NZpVFut_Raie64zubnKP2VtWO_uQgm2OW0SQK-sMppQ3HRT2LW4w/s200/default_avatar.gif


https://blogger.googleusercontent.com/img/b/R29vZ2xl/AVvXsEgBpAT5VZGS58_VvD7mOhKzrvW96U82fMSqZhU2e-t-pdW6XChnTe6IKTqne-qX7rV_W4_OeSg2WUiPmzMOgn3b-HLG_9MeJ6QrJQpIhAavlVSgbMkbGneesZ4B4lnV6MOOCvKpf8lcteE/s1600/facebook.gif


https://blogger.googleusercontent.com/img/b/R29vZ2xl/AVvXsEhZvmBBMvbQSZMrE6vXnHO8x9cR7OQH0x01_E8URCYBqOSlu8FaQO6aXA5V-6wwCJbc089OO1W3abGJJH6l3e9LrAAmmc2E_Io0JlECXih_h1k2d-fuxVv7lXlvIMg8HM41RTMAH3Rf23M/s1600/anonymous3.png

https://blogger.googleusercontent.com/img/b/R29vZ2xl/AVvXsEjVZDnZUJ8UgaWsG0Mus6v1UH4eBW4zOJzsgqhSKIf2D_328pW-j3EwITwlWUFTC24HS2OnzPbZf8j-G-lEtOOqU5XRI0CTsSGCc048ZeZCZywN-VoHWCKERC54JqASlQVYyAXw0Fym1iFE/s1600/blogger-user.png


  • Preview Your Template And Save it..!!


If you facing any problem with this Trick then feel free to ask in comment box below..!!
Happy Blogging..!!
Keep visiting @iGAWAR

Saturday, 20 October 2012

Internet Business Promoter 11.9 + Unlock Key Full Version Download

Internet Business Promoter 11.9 +Crack Free Download                    


Internet Business Promoter 11.9 + Unlock Key Full Version Download-iGAWAR

IBP is the multi award winning search marketing software that offers all the tools for achieving and sustaining higher positions on Google, Yahoo and other search engines on the web.

Tools included: search engine submitter, ranking checker, link builder, keyword analysis and research tool, website optimizer. Search engine submitter: Submit your website quickly and easily to all important search engines and Internet directories:. Ranking checker: 

Quickly check the position of your web pages for multiple keywords on multiple search engines. Link builder: Get high quality links to your website that will give your search engine rankings a boost. Keyword manager: Quickly find the best keywords for organic search engine optimization and pay per click. 

How to get top 10 rankings on Google & Yahoo! The proven SEO software tool!

Internet Business Promoter (IBP) is a multi-award winning website promotion software tool. IBP helps you get high search engine rankings:

* Get top 10 rankings on Google, Yahoo, Bing Search and others.
* Get more website visitors and increase your revenue.
* Outperform your competito

Top 10 Optimizer: Optimize your page content for top 10 rankings on Google, Yahoo and other major search engines IBP is a proven website promotion tool that will help you to get high search engine rankings, more customers and more sales.
· Submission tools
· Search Engine Ranking Checker
· Top 10 Optimizer
· website Optimization Editor
· Keyword Generator
· Link Popularity Tools
· Manual web search feature
· Scheduler
· PPC Search Engines Manager.
· ROI calculator.
· Includes a free search engine optimization eBook.


Wednesday, 17 October 2012

Google Adsense Alternates/Best Competitor for Google Adsense

Best services for earning money from your blog/website

Best services for earning money from your blog/website

Searching For Google Adsense Alternates???
Google adsense didnt accepted your blog/website??
No problem therir are many more services like adsense..!!


iGAWAR Presents Google adsense alternates ,Services that will boost up your earning..!!
These services has fast and high payout like adsense+some extra features which are missing in adsense.

These services are arranged as their popularity..!!


  • Adf.ly is a Service which Pays you If you use their Page directing Service..!!
This is the fastest growing add center and i personally use this.They Have awesome pay rates and many payment options.
You Can Sign up And Start Earning Online HERE.

                                             How To Download File Redirected To Adf.ly Page-igawar


  • Infolinks :: Infolinks is the top most Advertising program after Google Adsense. It provides Intext advertising for all kind of text based websites and blogs. If you have decent traffic on your site then you can make handsome revenue with Infolinks.


  • AdBrite ::  AdBrite has been one of the longest lasting competitors to Adsense, and has become quite popular as an alternative.Their policies are very similar to google adsense and they place "place your add here" on your blog..!!
AdBrite


  • Clicksor :: It offers webmasters the opportunity to earn additional income by simply underlining a selection of clickable text or displaying targeted contextual banners on their websites or blogs. Payments start at $50 be either PayPal or check.


  • Bidvertiser :: Allows you to decide where to place the ads as they provide you ads codes.Payouts start at only $10, so it shouldn’t be too hard to see the money start to come in.


Bidvertiser


  • Chtika :: Chitka is Best CPC website with high paying ads. Chitika provides a lot of alternatives to the usual “context advertising.”  If someone enters your a site via a search engine, they will be shown ads based on the terms they used to find your site, all the while your regular visitors won’t see a thing.

chitika


So what are you waiting for??
Choose any of these services and start earning..!!
Happy blogging..!!


Keep visiting @iGAWAR

Friday, 12 October 2012

How to Download file Via Adf.ly page

How To Download File Redirected To Adf.ly Page

How To Download File Redirected To Adf.ly Page-igawar
To Download Any File In iGAWAR You Need To Click On The Downloading Links Provided Below The DOWNLOAD LINKS
Adf.ly is a Service which Pays you If you use their Page directing Service..!!
You Can Sign up And Start Earning Online HERE
Hey Guys, Today i'll Share HOW TO DOWNLOAD FILE ,REDIRECTED TO adf.ly PAGE..!!


FOLLOW THE STEPS GIVEN BELOW:

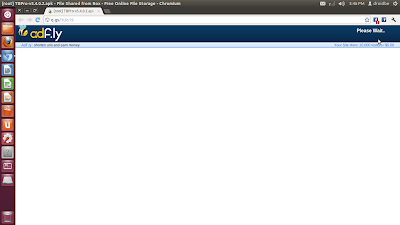
  • Whenever You Will Click On Any Downloading Link On iGAWAR,A window will open like the image shown below..!!
adf.ly-igawar 


  • This window is a Redirecting page towards Downloading Link So PLEASE do not Close This Window.
  • This Page will redirect you to Downloading page. So wait For 5-6 Secs.
  • Please Do Not Press back/Home button During Waiting Time..!!
  • You Can See the Waiting Time At the upper-Right Corner Of the Window..!!
  • After 5 Sec, Button Saying "SKIP AD" Will Appears At the Upper-Right Corner OF the Window .


  • Click On this Button And you will be redirected To the Downloading Page Straight away..!!


ADF.ly is Completly Safe And Secured..!!


You Can Sign up And Start Earning Online HERE

If you have any problem with this Article then feel free to ask in comment box below..!!

Keep visiting @iGAWAR


Tuesday, 9 October 2012

WYSIWYG Web Builder v8.5.3 + Crack Download

 WYSIWYG Web Builder v8.5 + crack full Download

WYSIWYG Web Builder v8.5 + crack full Download

Want to build a smart looking website/blog but didn't have coding knowledge??
A tool for blog/webpage designing tool/software..!!!
iGAWAR Presents WYSIWYG Web Builder ,A Tool created to be used mainly by beginners because you don't have to be proficient in HTML to use it. Everything can be controlled with your mouse, so there's no problem if you're not into coding too much.
The application supports most things you usually see on the Internet such as forms, banners, Flash video players, captchas, images, buttons, YouTube content, photo galleries and so much more.

Title:
WYSIWYG Web Builder
Filename:
webbu.exe
File size:
7.30MB (7,361,776 bytes)
Requirements:
Windows 2000 / XP x32/x64/ Vista x32/x64/ Windows7 x32/x64
Languages:
Multiple languages
Date Added:
Sept 30 , 2012
License:
Non-Commercial Freeware

SOFTWARE DOWNLOAD LINKS
CRACK DOWNLOAD LINKS


· No HTML knowledge needed!
· Drag and drop objects from the toolbox on the page anywhere you like!
· Site Management. Easily add, edit, clone and structure your web pages from a single file.
· Customizable menus, toolbars, keyboard accelerators, dockable windows, tabs, autohide windows.
· Form layout object to create forms, including actions, hidden fields etc.
· Supports Form fields: Editbox, TextArea, Checkbox, Radiobutton, Combobox and Button.
· Form Wizard to create form in 4 steps. Select from a dozen ready-to-use forms.
· Captcha object for (PHP) forms. Helps to stop spammers from submitting form data automatically.
· Rich text support: text object can contain different fonts, colors, links and sizes.
· Custom HTML object to insert your own HTML or Javascripts.
· JAVA, Flash, Windows Media, YouTube, Flash Video. Quicktime, Real Audio and other Plug-In support.
· Publish your entire web site, a single page or a group of pages (to local drive or a web server) .
· Built-in Photo Gallery maker, with lots of cool features like picture frames!
· Built-in Banner maker.
· Rollover images.
How to Download File
Ø    Click on the download links.
Ø    Wait for 5 seconds and then click on


SOFTWARE DOWNLOAD LINKS
CRACK DOWNLOAD LINKS

Report in comments Box below if any Download links are broken and deleted ...!!!!
Keep visiting @iGAWAR


Sunday, 23 September 2012

How to Customize Thread Comment System CSS

Tutorial for Customizing Thread Comment System For Best Comment box


Tutorial for Customizing Thread Comment System For Best Comment box

Every blogger wants a cute/macho look for their blog..!!
Comment box plays very important role in template view...!!
So HOW TO CUSTOMIZE COMMENT BOX??

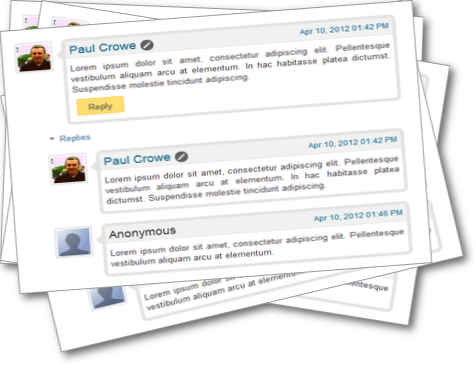
iGAWAR Presents How to Customize Thread Comment System CSS,A tutorial for customizing Thread Comment system..!!!

So Now how to Customize Thread Comment Css..!!

Just follow The below steps..!!

  • Go to Blogger Dashboard --> Template --> Edit HTML
  • Backup your Template before making any changes to your blog.Click here to know how to backup blog.
  • Now Check Expand Widget Template.
  • Press Ctrl + F and search the code shown below.
]]></b:skin>

Now ADD the Below code Just above it..!!


#comments{overflow:hidden}
#comments h4{display:inline;padding:10px;line-height:40px}
#comments h4,.comments .comment-header,.comments .comment-thread.inline-thread .comment{position:relative}
#comments h4,.comments .continue a{background:#d80556}
#comments h4,.comments .user a,.comments .continue a{font-size:16px}
#comments h4,.comments .continue a{font-weight:normal;color:#fff}
#comments h4:after{content:"";position:absolute;bottom:-10px;left:10px;border-top:10px solid #d80556;border-right:20px solid transparent;width:0;height:0;line-height:0}
#comments .avatar-image-container img{border:0}
.comment-thread{color:#111}
.comment-thread a{color:#777}
.comment-thread ol{margin:0 0 20px}
.comment-thread .comment-content a,.comments .user a,.comments .comment-thread.inline-thread .user a{color:#d80556}
.comments .avatar-image-container,.comments .avatar-image-container img{width:48px;max-width:48px;height:48px;max-height:48px}
.comments .comment-block,.comments .comments-content .comment-replies,.comments .comment-replybox-single{margin-left:60px}
.comments .comment-block,.comments .comment-thread.inline-thread .comment{border:1px solid #ddd;background:#f9f9f9;padding:10px}
.comments .comments-content .comment{margin:15px 0 0;padding:0;width:100%;line-height:1em}
.comments .comments-content .icon.blog-author{position:absolute;top:-12px;right:-12px;margin:0;background-image: url(https://blogger.googleusercontent.com/img/b/R29vZ2xl/AVvXsEjsOjd28Gh0GyFicWiXOzri4oRLKckNCVoFOdidQHy0fj8tF7CDvtIfuJmZ2YAiz6mcT57OqPTcYlGQQeYazcpXJADTSnBgr1rvXR6nTig-GEt8Kha4bEysuCYqhvIGbeb8VzGwEXaklFM/s320/author-pink.png);width:36px;height:36px}
.comments .comments-content .inline-thread{padding:0 0 0 20px}
.comments .comments-content .comment-replies{margin-top:0}
.comments .comment-content{padding:5px 0;line-height:1.4em}
.comments .comment-thread.inline-thread{border-left:1px solid #ddd;background:transparent}
.comments .comment-thread.inline-thread .comment{width:auto}
.comments .comment-thread.inline-thread .comment:after{content:"";position:absolute;top:10px;left:-20px;border-top:1px solid #ddd;width:10px;height:0px}
.comments .comment-thread.inline-thread .comment .comment-block{border:0;background:transparent;padding:0}
.comments .comment-thread.inline-thread .comment-block{margin-left:48px}
.comments .comment-thread.inline-thread .user a{font-size:13px}
.comments .comment-thread.inline-thread .avatar-image-container,.comments .comment-thread.inline-thread .avatar-image-container img{width:36px;max-width:36px;height:36px;max-height:36px}
.comments .continue{border-top:0;width:100%}
.comments .continue a{padding:10px 0;text-align:center}
.comment .continue{display:none}
#comment-editor{width:103%!important}
.comment-form{width:100%;max-width:100%}


The names will now have a pink color to it and the author’s comment will have a ribbon on the top-right corner of the box labeled ‘Author’ with the same color.

 If you wish to change the color, simply change d80556 to any of the following:
BLUE :: 1e05d8
GREEN :: 56d805

Now Save the Template And Visit Your Blog to See the Changes..!!

If you have any problem with this Tutorial then feel free to ask in comment box below..!!
Keep visiting @iGAWAR


Replace Default Comment system To Best Threaded Comment System For Blog/Website

Replace Default Comment view To Best Threaded Comment view For Blog/Website

Replace Default Comment view To Best Threaded Comment view For Blog/Website
Every blogger wants their blog looks cool..!!
Default Comment box provided by blogger or wordpress is boring and gives weird look to blog..!!
Not moving to 3rd party comment system like intensedebate coz that too increase loading time of blog.
So how to make comment system look Awesome??


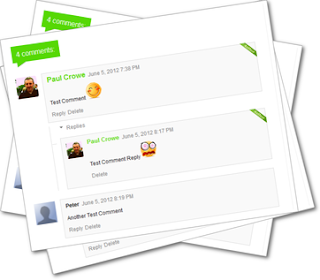
iGAWAR Present Replace Default Comment view To Best Threaded Comment view For Blog/Website , A tutorial that will completely change your blog's commenting experience..!!
Blogger upgraded their interface but it seems they didn't worked on their commenting policies.!!
Many of blogger tried third party comment services like intensedebate but soon they realise that Using such services increasing their page size and thus increasing their loading time..
So the question is, WHAT TO DO??


And answer came in the face of THREAD COMMENT SYSTEM...!!!
Today almost 60% of bloggers using Thread comment system..!!

So here is the step to step tutorial for how to replace Old default blog comment system to thread comment system..!!

Just follow the below steps::


  • Go to Blogger Dashboard --> Template --> Edit HTML
  • Backup your Template before making any changes to your blog.Click here to know how to backup blog.
  • Now Check Expand Widget Template.
  • Press Ctrl + F and search the code shown below.


<b:include data='post' name='comments'/>

iGAWAR's template Got 3 such code.Replace them all with the code below..!!


<b:if cond='data:post.showThreadedComments'>
<b:include data='post' name='threaded_comments'/>
<b:else/>
<b:include data='post' name='comments'/>
</b:if>


Bingo..

Thread comment Got ENABLED for Your Blog..!!

Save the template..!!

Please note that even your Comment system got activated but your comment looks will remain same untill you wont Upgrade your Comment CSS ..!!


If you have any problem with this Trick then feel free to ask in comment box below..!!
Keep visiting @iGAWAR