Showing posts with label Blog Tutorials. Show all posts

Wednesday, 16 January 2013

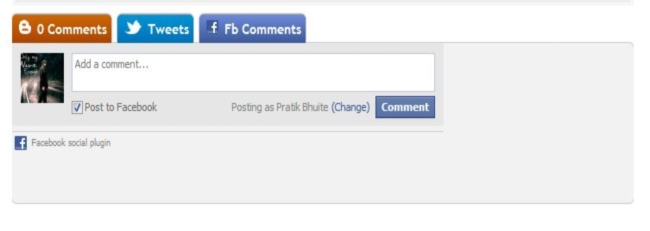
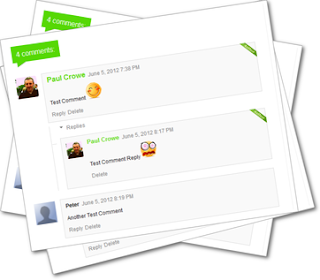
Integrate Facebook/Twitter Tab in Blogger Comment Box

Add Facebook/Twitter Tab in Blogger Comment Box

Add Facebook/Twitter Tab in Blogger Comment Box

Liked The facebook and Twitter tab Integration in intensedebate??
want facebook comment system along with default blogger comment box??
So here is the trick how to do that..!!!

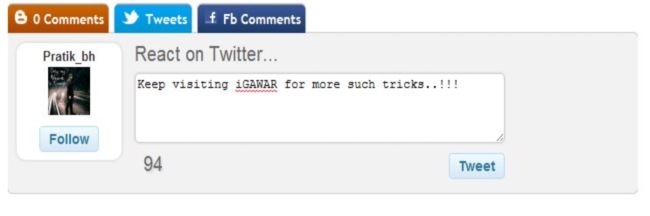
iGAWAR Presents Integrate Facebook/Twitter Tab in Blogger Comment Box, A tutorial that will Explain How to add facebook and twitter comment box along with your blogger default box to increase your visitors..!!!
So here is the trick to do so..!!

  • Go to Blogger Dashboard --> Template --> Edit HTML
  • Backup your Template before making any changes to your blog.Click here to know how to backup blog. 
  • Now Check Expand Widget Template.
  • Press Ctrl + F and search the code shown below.

<head> 

ADD Below Code Just Below <head>


<meta content='pratik.bhuite' property='fb:admins'/>
<meta content='YOUR_FACEBOOK_API' property='fb:app_id'/>
<script src='http://code.jquery.com/jquery-latest.pack.js'/>
<script src='http://jsblogstop.googlecode.com/svn/commentpages/jsCommentPages.js'/>
<script src='http://connect.facebook.net/en_US/all.js#xfbml=1'/>
<script src='http://jsblogstop.googlecode.com/svn/jstweetbox/v1/jsTweetBox.js'/>
<script src='http://platform.twitter.com/anywhere.js?id=TWITTER API KEY&amp;v=1'/>


Now Search for Below code

<div class='comments' id='comments'>

Now add The Below code just after above Code...!!!

<b:if cond='data:blog.pageType != &quot;static_page&quot;'>
<div class='js-default-tab comments-tab' id='blogger-comments' title='Comments from Blogger'>
<data:post.numComments/> Comments
</div>
<div class='comments-tab' id='twitter-comments' title='Comments with Twitter'>
<span class='js-page-tweet-count' expr:href='data:post.url'/> Tweets
</div>
<div class='comments-tab' id='fb-comments' title='Comments made on Facebook'>
<fb:comments-count expr:href='data:post.url'/> Fb Comments
</div>
</b:if>
<div class='clear'/>
</div>
<div class='comments-page' id='twitter-comments-page'>
<div data-bitly-key='R_b5f7d5706378f044755c16d1296708bb' data-bitly-login='pratikbhuite' data-publisher='pratikbhuite' id='js-tweet-box'/>
</div>
<div class='comments-page' id='fb-comments-page'>
<b:if cond='data:blog.pageType == &quot;item&quot;'>
<div id='fb-root'/>
<fb:comments expr:href='data:post.url' num_posts='10' width='500'/>
</b:if>
</div>
<div class='comments comments-page' id='blogger-comments-page'>


Now change the following things form the code

pratik.bhuite   ::  your facebook ID
YOUR_FACEBOOK_API :: your facebook API (Application ID CODE) code.
TWITTER API KEY ::  your Twitter App id key.
R_7fb135d4103581f8d39f59a86612ff27  :: yoyr btyly.com key and username.
if you dont hav bytly.com account keep my key/username only..!!


If you have any problem with this Trick then feel free to ask in comment box below..!!
Keep visiting @iGAWAR

Sunday, 30 December 2012

How to make Blog Archive Scrolling/look better?

How to reduce Size of Blog Archive By make it Scrolling?


How to make Blog Archive Scrolling?-iGAWAR 

Want To Make Your Long Archive List Short Without Removing Any Content??
Want To make Your Archive Look Attractive?
Want To Make Your Archive SEO Friendly..!!
iGAWAR Presents How to make Blog Archive Scrolling, A tutorial Which Helps you In Optimizing Your archive list by making It scroll And thus Reducing Its Size..!
Itz very Important to have Archive List On Your blog As itz the Easiest Ways For Your Visitor To Browse Your blog..!
But Having A Long Archive list Makes your blog Look Dull and un Attractive.So here We Come Up with this trick!!:)
You Can See The Live Demo, Here AT  iGAWAR .So lets Start With Code
  • Go to Blogger Dashboard --> Template --> Edit HTML
  • Backup your Template before making any changes to your blog.Click here to know how to backup blog.
  • Now Check Expand Widget Template.
  • Press Ctrl + F and search the code shown below.
<div id='ArchiveList'>
This Code Will BE like


<div id='ArchiveList'>
  <div expr:id='data:widget.instanceId + &quot;_ArchiveList&quot;'>
    <b:if cond='data:style == &quot;HIERARCHY&quot;'>
     <b:include data='data' name='interval'/>
    </b:if>
    <b:if cond='data:style == &quot;FLAT&quot;'>
      <b:include data='data' name='flat'/>
    </b:if>
    <b:if cond='data:style == &quot;MENU&quot;'>
      <b:include data='data' name='menu'/>
    </b:if>
  </div>
  </div>


Replace this Entire Code By


<div style='overflow:auto; width:ancho;height:300px;'>
<div id='ArchiveList'>
<div expr:id='data:widget.instanceId + "_ArchiveList"'>
<b:if cond='data:style == "HIERARCHY"'>
<b:include data='data' name='interval'/>
</b:if>
<b:if cond='data:style == "FLAT"'>
<b:include data='data' name='flat'/>
</b:if>
<b:if cond='data:style == "MENU"'>
<b:include data='data' name='menu'/>
</b:if>
</div>
</div>
</div>

To Change Height Of Archive Scroll Box Change height:300px;


  • Preview Your Template And Save it..!!


If you facing any problem with this Trick then feel free to ask in comment box below..!!
Happy Blogging..!!
Keep visiting @iGAWAR

Saturday, 29 December 2012

How To Add Two Sidebar Above/Below To Any Default Sidebar

How to Divide Blog template's Sidebar Into two Parts?


How To Add Two Sidebar Above/Below Any Default Sidebar-iGAWAR


Want to Add two sidebar Just below And above any default sidebar??
Want to Divide A single sidebar into two of any width??
iGAWAR Presents How To Add Two Sidebar Above/Below Any Default Sidebar , A tutorial that will Help You to Customize Your Blog template's Sidebar.Thanks to simplebloggertutorials for Creating this trick..I just Customized it further And explained it in simple ways..!!


So lets Start Customizing Your Sidebar:

The main Sidebar Is assigned As #sidebar-wrapper  in most of the templates.
If you have 3 Column templates then the the Other sidebar will be named as  #sidebar-wrapper1 and  #sidebar-wrapper2.


To Add two Sidebar In Main Sidebar , Follow Below Steps:
  • Go to Blogger Dashboard --> Template --> Edit HTML
  • Backup your Template before making any changes to your blog..Click here to know how to backup blog.
  • Press Ctrl + F and search the code shown below.
#sidebar-wrapper {
width:220px;
float:right;
word-wrap:break-word;
overflow:hidden;
}

Add the Following Code Just Behind The Above Code Code:

#right-col {
width:48%;
float:right;
word-wrap:break-word;
overflow:hidden;
}
#left-col {
width:48%;
float:left;
word-wrap:break-word;
overflow:hidden;
}

Now Find

<div id='sidebar-wrapper'>
<b:section class='sidebar' id='sidebar' preferred='yes'/>
</div>

Replace this Entire Code  By Below Code:

To Add Two sidebar below main widget use this code:


<div id='sidebar-wrapper'>
<b:section class='sidebar' id='sidebar' preferred='yes'/>
<b:section class='sidebar' id='left-col' preferred='yes'/>
<b:section class='sidebar' id='right-col' preferred='yes'/>
</div>

To Add Two sidebar Above main widget use this code:

<div id='sidebar-wrapper'>
<b:section class='sidebar' id='left-col' preferred='yes'/>
<b:section class='sidebar' id='right-col' preferred='yes'/>
<b:section class='sidebar' id='sidebar' preferred='yes'/>
</div>

To change the Width of new left/right Side bar
Change
width:48%;
you can change 48% to any number.
just make sure that the sum of both the width is less that 98%.


Preview the template and save it..!
Check layout section to observe the Change..!!

                                                       igawar customizing sidebar into two parts


If you facing any problem with this Trick then feel free to ask in comment box below..!!
Happy Blogging..!!
Keep visiting @iGAWAR

Wednesday, 24 October 2012

How to Add A Picture To Anonymous Comment Of your Blog Post

How To Change Blogger Default Anonymous Comment Avatar/picture

How to Add A Picture To Anonymous Comment Of your Blog Post-iGAWAR
Want to change Your anonymous Comment Avatar??
Want to stylify Your blog Comment using Cool Avatar??

iGAWAR Presents How to Add A Picture To Anonymous Comment Of your Blog Post, A tutorial That will help you to change your default Anonymous Comment Avatar/Image in Easy Steps..!
Change Avatar of Anonymous As well As Default Pic And Make You Blog Attractive..!!

So lets Start With How To do This:


  • Go to Blogger Dashboard --> Template --> Edit HTML
  • Backup your Template before making any changes to your blog.Click here to know how to backup blog.
  • Press Ctrl + F and search the code shown below.


</body>

Add Following  Code Just Above The above Code:

<script src='http://code.jquery.com/jquery-latest.js'/>
<script>
$(&quot;img[src=&#39;http://img1.blogblog.com/img/anon36.png&#39;]&quot;)
.attr(&#39;src&#39;, &#39;https://blogger.googleusercontent.com/img/b/R29vZ2xl/AVvXsEhDoVrwwOyDVJNQ0ie9GW927nQv9dIN3PIbz76Lk3edFHWQd1akz1py_rcak_cxwEjfmys4HTzmnKRNgLw5g437dd5NZpVFut_Raie64zubnKP2VtWO_uQgm2OW0SQK-sMppQ3HRT2LW4w/s1600/default_avatar.gif&#39;)
.ssyby(&#39;blank&#39;)
</script>
<script src='http://code.jquery.com/jquery-latest.js'/>
<script>
$(&quot;img[src=&#39;http://img2.blogblog.com/img/b36-rounded.png&#39;]&quot;)
.attr(&#39;src&#39;, &#39;https://blogger.googleusercontent.com/img/b/R29vZ2xl/AVvXsEg8AY3LS57hSptAMOLx1Fv-mc5rvoMziJsfsLdckAXzirRJcgYf2wkY-mJvedPQoLFcNdEvh64okb2JPnLlcW_lIEsVEOrZKkwa05A4yW1CE9Bw-XLaqrVH1ESvJN8U9VJGpguARV1F4O8/s1600/blogger-user.png&#39;)
.ssyby(&#39;blank&#39;)
 </script>


Change the Pic Url In RED With Your Choice To change Anonymous Avatar.
Change Pic Url In Green With Your Choice To change Default Avatar.

Some Good Picture url Are:


https://blogger.googleusercontent.com/img/b/R29vZ2xl/AVvXsEhDoVrwwOyDVJNQ0ie9GW927nQv9dIN3PIbz76Lk3edFHWQd1akz1py_rcak_cxwEjfmys4HTzmnKRNgLw5g437dd5NZpVFut_Raie64zubnKP2VtWO_uQgm2OW0SQK-sMppQ3HRT2LW4w/s200/default_avatar.gif


https://blogger.googleusercontent.com/img/b/R29vZ2xl/AVvXsEgBpAT5VZGS58_VvD7mOhKzrvW96U82fMSqZhU2e-t-pdW6XChnTe6IKTqne-qX7rV_W4_OeSg2WUiPmzMOgn3b-HLG_9MeJ6QrJQpIhAavlVSgbMkbGneesZ4B4lnV6MOOCvKpf8lcteE/s1600/facebook.gif


https://blogger.googleusercontent.com/img/b/R29vZ2xl/AVvXsEhZvmBBMvbQSZMrE6vXnHO8x9cR7OQH0x01_E8URCYBqOSlu8FaQO6aXA5V-6wwCJbc089OO1W3abGJJH6l3e9LrAAmmc2E_Io0JlECXih_h1k2d-fuxVv7lXlvIMg8HM41RTMAH3Rf23M/s1600/anonymous3.png

https://blogger.googleusercontent.com/img/b/R29vZ2xl/AVvXsEjVZDnZUJ8UgaWsG0Mus6v1UH4eBW4zOJzsgqhSKIf2D_328pW-j3EwITwlWUFTC24HS2OnzPbZf8j-G-lEtOOqU5XRI0CTsSGCc048ZeZCZywN-VoHWCKERC54JqASlQVYyAXw0Fym1iFE/s1600/blogger-user.png


  • Preview Your Template And Save it..!!


If you facing any problem with this Trick then feel free to ask in comment box below..!!
Happy Blogging..!!
Keep visiting @iGAWAR

Sunday, 23 September 2012

How to Customize Thread Comment System CSS

Tutorial for Customizing Thread Comment System For Best Comment box


Tutorial for Customizing Thread Comment System For Best Comment box

Every blogger wants a cute/macho look for their blog..!!
Comment box plays very important role in template view...!!
So HOW TO CUSTOMIZE COMMENT BOX??

iGAWAR Presents How to Customize Thread Comment System CSS,A tutorial for customizing Thread Comment system..!!!

So Now how to Customize Thread Comment Css..!!

Just follow The below steps..!!

  • Go to Blogger Dashboard --> Template --> Edit HTML
  • Backup your Template before making any changes to your blog.Click here to know how to backup blog.
  • Now Check Expand Widget Template.
  • Press Ctrl + F and search the code shown below.
]]></b:skin>

Now ADD the Below code Just above it..!!


#comments{overflow:hidden}
#comments h4{display:inline;padding:10px;line-height:40px}
#comments h4,.comments .comment-header,.comments .comment-thread.inline-thread .comment{position:relative}
#comments h4,.comments .continue a{background:#d80556}
#comments h4,.comments .user a,.comments .continue a{font-size:16px}
#comments h4,.comments .continue a{font-weight:normal;color:#fff}
#comments h4:after{content:"";position:absolute;bottom:-10px;left:10px;border-top:10px solid #d80556;border-right:20px solid transparent;width:0;height:0;line-height:0}
#comments .avatar-image-container img{border:0}
.comment-thread{color:#111}
.comment-thread a{color:#777}
.comment-thread ol{margin:0 0 20px}
.comment-thread .comment-content a,.comments .user a,.comments .comment-thread.inline-thread .user a{color:#d80556}
.comments .avatar-image-container,.comments .avatar-image-container img{width:48px;max-width:48px;height:48px;max-height:48px}
.comments .comment-block,.comments .comments-content .comment-replies,.comments .comment-replybox-single{margin-left:60px}
.comments .comment-block,.comments .comment-thread.inline-thread .comment{border:1px solid #ddd;background:#f9f9f9;padding:10px}
.comments .comments-content .comment{margin:15px 0 0;padding:0;width:100%;line-height:1em}
.comments .comments-content .icon.blog-author{position:absolute;top:-12px;right:-12px;margin:0;background-image: url(https://blogger.googleusercontent.com/img/b/R29vZ2xl/AVvXsEjsOjd28Gh0GyFicWiXOzri4oRLKckNCVoFOdidQHy0fj8tF7CDvtIfuJmZ2YAiz6mcT57OqPTcYlGQQeYazcpXJADTSnBgr1rvXR6nTig-GEt8Kha4bEysuCYqhvIGbeb8VzGwEXaklFM/s320/author-pink.png);width:36px;height:36px}
.comments .comments-content .inline-thread{padding:0 0 0 20px}
.comments .comments-content .comment-replies{margin-top:0}
.comments .comment-content{padding:5px 0;line-height:1.4em}
.comments .comment-thread.inline-thread{border-left:1px solid #ddd;background:transparent}
.comments .comment-thread.inline-thread .comment{width:auto}
.comments .comment-thread.inline-thread .comment:after{content:"";position:absolute;top:10px;left:-20px;border-top:1px solid #ddd;width:10px;height:0px}
.comments .comment-thread.inline-thread .comment .comment-block{border:0;background:transparent;padding:0}
.comments .comment-thread.inline-thread .comment-block{margin-left:48px}
.comments .comment-thread.inline-thread .user a{font-size:13px}
.comments .comment-thread.inline-thread .avatar-image-container,.comments .comment-thread.inline-thread .avatar-image-container img{width:36px;max-width:36px;height:36px;max-height:36px}
.comments .continue{border-top:0;width:100%}
.comments .continue a{padding:10px 0;text-align:center}
.comment .continue{display:none}
#comment-editor{width:103%!important}
.comment-form{width:100%;max-width:100%}


The names will now have a pink color to it and the author’s comment will have a ribbon on the top-right corner of the box labeled ‘Author’ with the same color.

 If you wish to change the color, simply change d80556 to any of the following:
BLUE :: 1e05d8
GREEN :: 56d805

Now Save the Template And Visit Your Blog to See the Changes..!!

If you have any problem with this Tutorial then feel free to ask in comment box below..!!
Keep visiting @iGAWAR


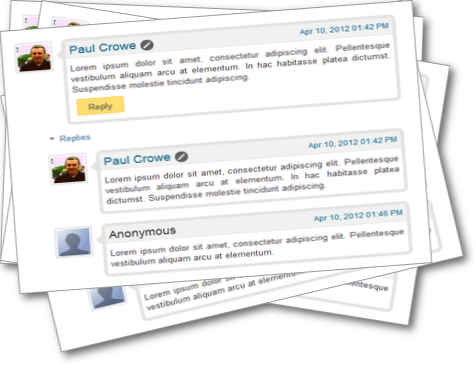
Replace Default Comment system To Best Threaded Comment System For Blog/Website

Replace Default Comment view To Best Threaded Comment view For Blog/Website

Replace Default Comment view To Best Threaded Comment view For Blog/Website
Every blogger wants their blog looks cool..!!
Default Comment box provided by blogger or wordpress is boring and gives weird look to blog..!!
Not moving to 3rd party comment system like intensedebate coz that too increase loading time of blog.
So how to make comment system look Awesome??


iGAWAR Present Replace Default Comment view To Best Threaded Comment view For Blog/Website , A tutorial that will completely change your blog's commenting experience..!!
Blogger upgraded their interface but it seems they didn't worked on their commenting policies.!!
Many of blogger tried third party comment services like intensedebate but soon they realise that Using such services increasing their page size and thus increasing their loading time..
So the question is, WHAT TO DO??


And answer came in the face of THREAD COMMENT SYSTEM...!!!
Today almost 60% of bloggers using Thread comment system..!!

So here is the step to step tutorial for how to replace Old default blog comment system to thread comment system..!!

Just follow the below steps::


  • Go to Blogger Dashboard --> Template --> Edit HTML
  • Backup your Template before making any changes to your blog.Click here to know how to backup blog.
  • Now Check Expand Widget Template.
  • Press Ctrl + F and search the code shown below.


<b:include data='post' name='comments'/>

iGAWAR's template Got 3 such code.Replace them all with the code below..!!


<b:if cond='data:post.showThreadedComments'>
<b:include data='post' name='threaded_comments'/>
<b:else/>
<b:include data='post' name='comments'/>
</b:if>


Bingo..

Thread comment Got ENABLED for Your Blog..!!

Save the template..!!

Please note that even your Comment system got activated but your comment looks will remain same untill you wont Upgrade your Comment CSS ..!!


If you have any problem with this Trick then feel free to ask in comment box below..!!
Keep visiting @iGAWAR


How to backup and restore your blog Template

How to Download/Backup and Restore your blog Template

How to Download/Backup and Restore your blog Template


Wanna change undesired things of your templates??
But what if you end up with some error in template and want your old template back??
SO BACKUP your template First..!!!

iGAWAR Presents How To Backup Your Blog Template , a tutorial that will Explain How to Backup your Template.

All you have to do is follow the blow steps..!!

HOW TO DOWNLOAD/BACKUP A TEMPLATE?

  • Go to Blogger Dashboard
  • Click on Template


  • This will open a window infront of you.!!
  • Click on Backup/Restore, present at right top of screen.


  • A popup window will open..!!
  • Now to Backup your Template Before editing it , Click on  DOWNLOAD FULL TEMPLATE..!!


This will ask you to select the location where you want to save the template..!!
and bingo.. your template will get saved at given location in seconds..!!!
now you can edit the template..!!

HOW TO RESTORE THE TEMPLATE?

If something goes while editing template you can get back your template safely..!!

  • Follow the same above steps till Final download template window.
  • Now to Restore the template,click on choose file button..!!
  • Select the template which you had downloaded earlier.
  • After selecting template,Click on Upload.!!
  • This will restore your template safely..!!


Please Note that the change in widgets are irreversible..!!!

If you have any problem with this Trick then feel free to ask in comment box below..!!
Keep visiting @iGAWAR

Blog Optimization Techniques For Better PageRank

Blog Optimization Technique For Maximum Traffic/SEO

Blog Optimization Technique For Maximum Traffic/SEO

Created a blog and started posting Articles but not getting the traffic you expected..??!!!
Tried many SEO optimization technique but still getting lower Page Rank.??..!!
SO itz time to optimize your blog..!!!

iGAWAR Presents BLOG OPTIMIZATION TECHNIQUE,which will opmimize your blog for maximum result,which means maximum traffic and better page rank..!!
These three steps will optimize the most important part of a blog..!!

All you have to do is follow below steps...!!


Step I :: CREATE LINK OPTIMIZATION

Press Ctrl + F and search the code shown below.

 expr:href='data:post.createLinkUrl'


Replace this above code with the code given below


expr:href='data:post.createLinkUrl' rel='external nofollow'


Step II :: COMMENT OPTIMIZATION 


Press Ctrl + F and search the code shown below.

a expr:href='data:comment.authorUrl'

Replace this above code with the code given below

  a expr:href='data:comment.authorUrl' rel='external nofollow'


STEP III :: ARCHIVE OPTIMIZATION


Press Ctrl + F and search the code shown below.


<a class='post-count-link' expr:href='data:i.url'>


 Replace this above code with the code given below


  <a rel="archives" class='post-count-link' expr:href='data:i.url'>


If you have any problem with this Trick then feel free to ask in comment box below..!!
Keep visiting @iGAWAR

Friday, 21 September 2012

How to install/apply customized template to your blog

Tutorial for How to install/apply customized template/theme to your blog in easy steps

Tutorial for How to install/apply customized template/theme to your blog in easy steps
Blogger updated their interface which includes many new features which mainly includes the tools to increase search performances,look and style and made blogging more user friendly..!!!!
Blogger added some of new template under awesome,travel,dynamic etc categories which are really cool..!!
but many blogger want to have a customized template...!!!
So how to do it??

You can install any html template on your blogspot all you have to do is follow these steps..!!

  • Go to Blogger Dashboard
  • Click on Template
  • Click on Backup/Restore(placed upper left of the page ).

  • Click on Choose file button.
  • Select your template location.
  • If you don't have any template , then you can Download Free templates here.
  • Select the template you want to install.
  • Click on upload.
  • Wait until blogger install new template to your blog.!!
  • Once you are done,click on view blog to see the changes..!!!
Note that your widgets and gadgets and even the customized content of previous Template wont get delete and they will be their in new template..!!


If you have any problem with this Trick then feel free to ask in comment box below..!!
 Keep visiting @iGAWAR

Wednesday, 19 September 2012

How to restrict Google to change country code domain of your blog

How to restrict Google to change country code domain of your blog

How to restrict Google to change country code domain of your blog
you might have notice that your blog domain gets changed from .com to .in .cu .pk .au etc depending upon the country of the viewer..!!!
As this also cause poor page ranking in search result ..!!!
But many blogger dont want their Blog domain to be changed...!!
so what to do???

iGAWAR presents a unique trick to restrict google to change your blog/website domain. This tutorial will explain how to maintain same domain (.com) for blogger..!!
you can see my blog url in address bar, itz igawar.blogspot.com  only..!!!

Change in domain countrywise also makes your pageranking goes down because search engine reads it as duplicate content..!!!! 

FOLLOW THESE STEPS TO APPLY THIS TRICK TO YOUR BLOG


  • Go to Blogger Dashboard --> Design --> Edit HTML
  • Backup your Template before making any changes to your blog.
  • Now Check Expand Widget Template.
  • Press Ctrl + F and search the code shown below.


<head>


  • Paste this code just below the <head>

<script type="text/javascript">
var blog = document.location.hostname;
var slug = document.location.pathname;
var ctld = blog.substr(blog.lastIndexOf("."));
if (ctld != ".com") {
var ncr = "http://" + blog.substr(0, blog.indexOf("."));
ncr += ".blogspot.com/ncr" + slug;
window.location.replace(ncr);
}
</script>


Use this trick and let me know that this works for you or not..!!
If you have any problem with this Trick then feel free to ask in comment box below..!!

Keep visiting @iGAWAR

Tuesday, 18 September 2012

EASIEST WAY TO SUBMIT SITEMAP TO GOOGLE SEARCH ENGINE

EASIEST WAY TO SUBMIT SITEMAP TO GOOGLE SEARCH ENGINE 

Everyone wants a higher ranking on search results..!!
So submitting sitemaps to search engine can help ...!!!
But the question is
HOW  TO SUBMIT SITEMAPS??

Here is a tutorial for submit sitemap of a blog to google in simplest way possible in just 2 mins..!!!


FOLLOW THE BELLOW STEPS


  • Open Google Webmaster Dashboard
  • Their you will see a box like below so click  on >>

EASIEST WAY TO SUBMIT SITEMAP TO GOOGLE SEARCH ENGINE

or


  • Go to optimization ------> Sitemaps


now paste the code below in highlighted part ..

For post below 500
atom.xml?redirect=false&start-index=1&max-results=500

for post between 500-1000

atom.xml?redirect=false&start-index=1&max-results=500
atom.xml?redirect=false&start-index=501&max-results=500


for post between 1000 above

atom.xml?redirect=false&start-index=1&max-results=500
atom.xml?redirect=false&start-index=501&max-results=500
atom.xml?redirect=false&start-index=1001&max-results=500


After you submit sitemap you can review it..!!


If you have any problem with this Trick then feel free to ask in comment box below..!!

Keep visiting @iGAWAR

Wednesday, 12 September 2012

HOW TO REPLACE "READ MORE.." LINK OF BLOGSPOT TO CUTE READ MORE BUTTON

HOW TO REPLACE "READ MORE.." LINK OF BLOGSPOT TO CUTE READ MORE BUTTON

HOW TO REPLACE "READ MORE.." LINK OF BLOGSPOT TO CUTE READ MORE BUTTON


As i previously posted HOW TO ADD "READ MORE" BUTTON ON BLOGSPOT POST WITHOUT ANY CODING ,Many people find the read more... link boring and oldy..!!

Thats Why iGAWAR is Back with new trick to change Read more.. link to Cute Read more>> button..!!!

so here is new trick to change that link to a cute READ more button
All you have to do is this simple coding..!!


  • Go to Blogger Dashboard --> Design --> Edit HTML
  • Backup your Template before making any changes to your blog.  Click here to know how to backup blog
  • Now Check Expand Widget Template.
  • Press Ctrl + F and search the code shown below.
<b:if cond='data:post.hasJumpLink'>

Now you will see a code like Shown Below..!!!

<div class='jump-link'>
       <center> <a expr:href='data:post.url + &quot;#more&quot;' expr:title='data:post.title'>Read more..</a></center>
      </div>


Replace Readmore with the code below


<img src='https://blogger.googleusercontent.com/img/b/R29vZ2xl/AVvXsEjUuFEQm6uGj2jMCXBXfF8dyDXGYbIXwSgayIw7v19G301ZWDKakCsVgTaqWe-FK3INgL2e_8rZXfJV4LLRIRBedmjLCbgnpilFj2HmjV2z4KU3vJpF0p4IF7nzrKh1n7c-Q-BW6lL9NvA/s1600/readmore1.PNG'/>


Now preview/Save your Template.

Bingo..!!! now your Read more Link Is replace with a Cute Read more button shown below


you can cange this button with any other button for that just replace the img src url in that code with the url of your button.!!
png image is always more better than jpeg..!!

If you have any problem with this Trick then feel free to ask in comment box below..!!


Keep visiting @iGAWAR
HOW TO ADD "READ MORE" BUTTON ON BLOGSPOT POST WITHOUT ANY CODING

HOW TO ADD "READ MORE" BUTTON ON BLOGSPOT POST WITHOUT ANY CODING

HOW TO ADD "READ MORE" BUTTON ON BLOGSPOT POST WITHOUT ANY CODING


Long blog content But want to show only summary to readers?
So all you to do is use read more option..!!

problems come with non technical blogger is HOW TO ADD READ MORE OPTION TO YOUR BLOG??

So Every1 wants a simple option to do that..!!

iGAWAR is back with all new trick for blogger users to place READ MORE button in their post where ever they want without any coding..!!!

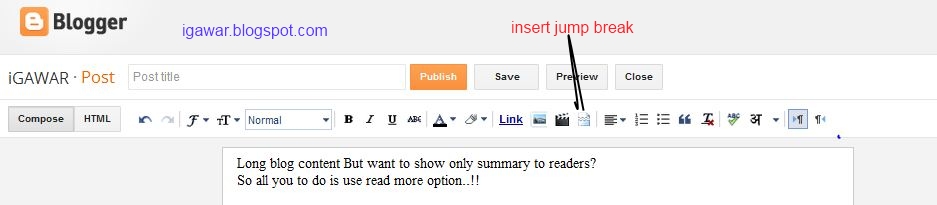
all you have to do is use insert jump break ....!!


  • Open BLOGGER Dashboard
  • NEW post
  • Write your article
  • Now place your cursor where you want to place read more and click on 'INSERT JUMP BREAK'.!!


NOW IT will add a Read more... link at that place ..!!
User will see only the part above that link on main page and if they wish to see full article they hav to click on read more link..!!

you can also convert this read more... link to some cute READ MORE buttons..!!
READ this for this trick

If you have any problem with this Feature then feel free to ask in comment box below..!!

Keep visiting @iGAWAR

Monday, 10 September 2012

Most appropriate Meta Tags CODE

Most appropriate Meta Tags CODE


Most appropriate Meta Tags CODE


Created a blog.!! Now whats next?? make your blog configured properly to reach to maximum peoples.so
1stly and most importantly you should assign META TAG on your blog/website..
So the question is WHAT META TAGS ACTUALLY ARE????

What are Meta Tags?

Meta tags are HTML codes that are inserted into the header on a web page, after the title tag. In the context of search engine optimization, when people refer to meta tags, they are usually referring to the meta description tag and the meta keywords tag.

The meta description tag and the meta keywords tag are not seen by users. Instead, these tags main purpose is providing meta document data to user agents, such as search engines. In addition to the well-known meta description and meta keywords tags, there are other useful meta tags, including the meta http-equiv tag, meta refresh tag, the meta robots tag, the meta copyright tag, and the meta author tag, etc. These tags are used to give web browsers and search engine spiders directions or data on various information.

WANT BEST META TAG CODE??

what is the most appropriate and exact code for meta tag?


  • Open blogger
  • Dashboard
  • Templates
  • Edit HTML
  • Proceed
  • press ctrl + F
  • and type <head>

This code must be paste just after <head>


<meta content='ADD YOUR SITE DESCRIPTION HERE' name='description'/>

<meta content='KEYWORDS' name='keywords'/>


<meta content='YOUR NAME' name='author'/>
<meta content='NAME' name='owner'/>
<meta content='(c) 2012' name='copyright'/>

<meta content='INDEX,FOLLOW' name='robots'/>
<meta content='global' name='distribution'/>
<meta content='5 days' name='revisit'/>
<meta content='5 days' name='revisit-after'/>
<meta content='document' name='resource-type'/>
<meta content='all' name='audience'/>
<meta content='general' name='rating'/>
<meta content='all' name='robots'/>
<meta content='index, follow' name='robots'/>
<meta content='YOUR BLOG LANGUAGE' name='language'/>
<meta content='COUNTRY NAME' name='country'/>
<meta content='BLOG PROVIDER' name='generator'/>


Replace these highlighted terms by respective content

  • ADD YOUR SITE DESCRIPTION HERE - This section talks about your blog content.you should give a small description of what your blog is about.

  • KEYWORDS-Add different keywords suits best for your blog.you can add many keywords seperated by comma ','.20 keywords are more than enough.

  • YOUR NAME-Author's name (not be shown to visitors).

  • NAME- Owner's name (not be shown to visitors).

  • YOUR BLOG LANGUAGE- your blog's content language like for english write 'en'.

  • COUNTRY NAME- your country name.

  • BLOG PROVIDER- your blog provider like 'blogger' if its blogspot.

Click Here to ANALYZE your Meta Tag is Correct Or Not

I tried to be as simple as i can.But If you still got any problem in these Codes write in comment below


Keep visiting @iGAWAR